Run Your First Workflow
1. Open the desktop app
Section titled “1. Open the desktop app”On first launch, use the setup flow to confirm:
- your default workspace path
- the guided or advanced experience path you want to use
- Git readiness and any automatic installation prompt if Git is missing
- local model availability if you are using Ollama or another local runtime
- optional CLI shell integration if you want
maabariumavailable in Terminal through the managed~/.local/bin/maabariumlink - any provider credentials needed for the blueprint you want to run
The setup modal now supports two operator modes:
Guidedkeeps the first-run path opinionated with environment profiles and safer defaults.Advancedexposes lower-level runtime strategy and research-search controls directly.
When you stay in Guided mode, the environment profiles map to the common runtime shapes:
Local Onlykeeps the run path centered on Ollama and local models.Mixedkeeps local models in play but prepares remote providers as optional fallbacks.Research Heavybiases the runtime toward remote providers, but still keepsDuckDuckGo scrapeas the default search-discovery mode until you explicitly switch to Advanced and chooseBrave API.
If you are using Ollama, the setup flow keeps the model step explicit:
- install Ollama if it is not present yet
- start Ollama if the local service is not running yet
- use
Pull Recommended Modelsafter Ollama is running to download the suggested local models for bundled workflows
If you plan to use research-oriented workflows, the same setup flow also lets you choose how web search should work:
DuckDuckGo scrapekeeps the default local-first path with no separate Brave API credential requirementBrave APIuses the Brave-backed search path when that credential is configured
Setup modal walkthrough
Section titled “Setup modal walkthrough”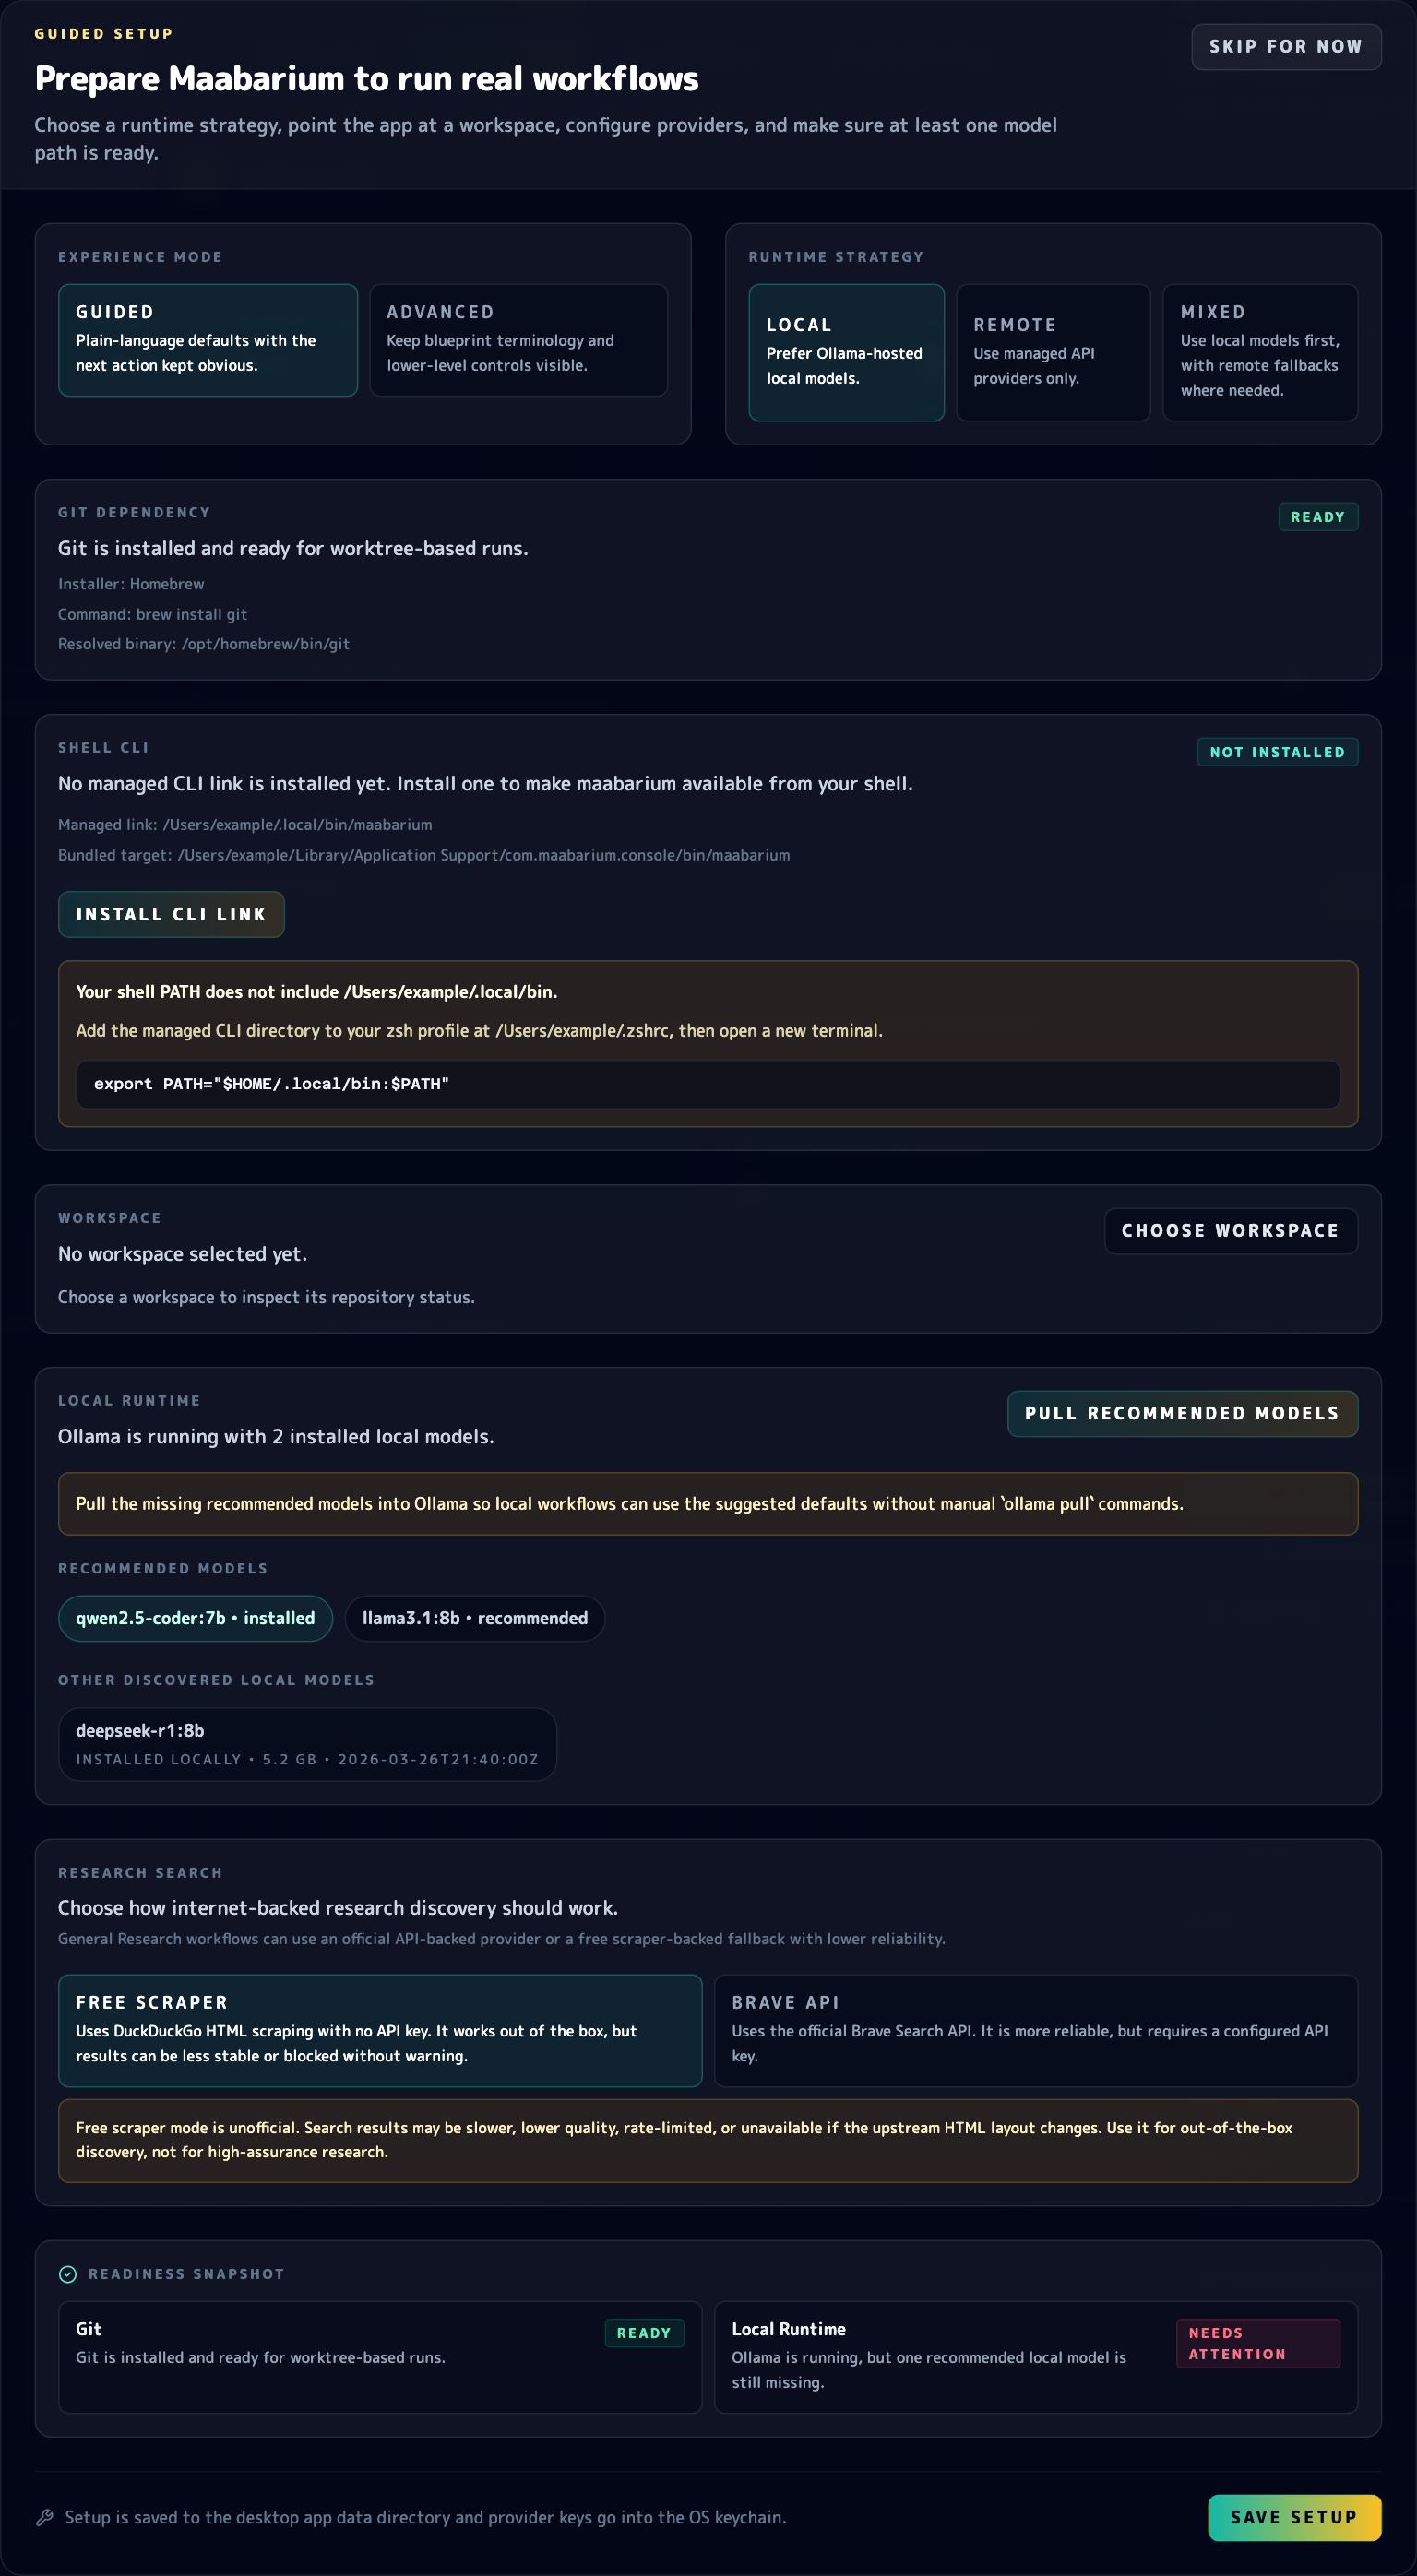
The guided setup modal keeps Git readiness, shell CLI setup, workspace selection, and Ollama model pulls in one place before the first run.
Use the setup modal in this order:
- Choose the experience mode and runtime strategy first. That decides whether you are optimizing for a local Ollama flow, a remote-provider flow, or a mixed setup.
- Resolve machine-level prerequisites next. The same modal surfaces Git readiness, the optional
Install CLI Linkaction for~/.local/bin/maabarium, shellPATHguidance, and the default workspace selector. - Check the workspace analysis block before you save. The setup flow can auto-detect project summary details such as the primary language, a likely test command, suggested target files, and whether CI config is already present.
- Finish the runtime section before starting a workflow. If Ollama is already running,
Pull Recommended Modelsdownloads the suggested local models without making you drop into Terminal and run individualollama pullcommands. If you are using remote providers, validate them here and choose a default model before saving setup.
When those sections look healthy, save setup and move on to blueprint selection.
2. Pick a workflow
Section titled “2. Pick a workflow”Start with one of the bundled workflow blueprints from the workflow library. If you are learning the system, avoid the most ambitious templates first. Choose something that lets you verify the loop end to end.
3. Confirm the workspace
Section titled “3. Confirm the workspace”When Maabarium asks where to run the workflow, point it at a real project directory. If the folder is not already a Git repository, Maabarium can initialise one for you so future branching and evaluation steps behave correctly.
The onboarding flow also inspects the saved workspace path up front. That lets you catch missing folders, non-directory paths, missing Git state, and useful project metadata before the first run starts.
If Git itself is missing, the desktop setup flow or CLI run path should tell you that directly. On supported systems, Maabarium will attempt to install Git automatically instead of failing silently.
4. Start the run
Section titled “4. Start the run”Use the desktop Run Flow action or the CLI if you prefer terminals.
cargo run -p maabarium-cli -- run blueprints/example.toml --db data/maabarium.dbCLI runs now perform a Git preflight before the workflow starts. After the run finishes, the CLI also prints an aggregated timing summary so you can see phase totals and average iteration cost without digging through raw logs.
If you are using the desktop app, watch the console section for:
- latest proposal activity
- logs
- research evidence or evaluation output
- status changes between idle, running, and stopping
5. Review what happened
Section titled “5. Review what happened”A successful first run should leave you with visible evidence, not just a green check:
- persisted experiments
- proposals or evaluation logs
- an updated Git workspace or branch history
- a CLI timing summary if you launched the run from the terminal
- enough context to understand why the result was accepted or rejected
If the first run fails
Section titled “If the first run fails”Go directly to Troubleshooting. The common issues are almost always environment, model availability, workspace state, or credentials.
If you need to revisit the same checks later, use the desktop Maintenance area to open Run Setup again. The setup flow is meant to stay available as an operational tool, not just a one-time installer screen.